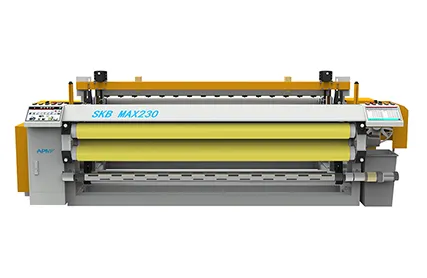
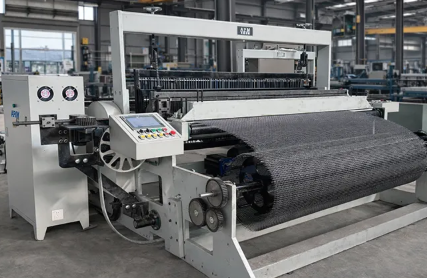
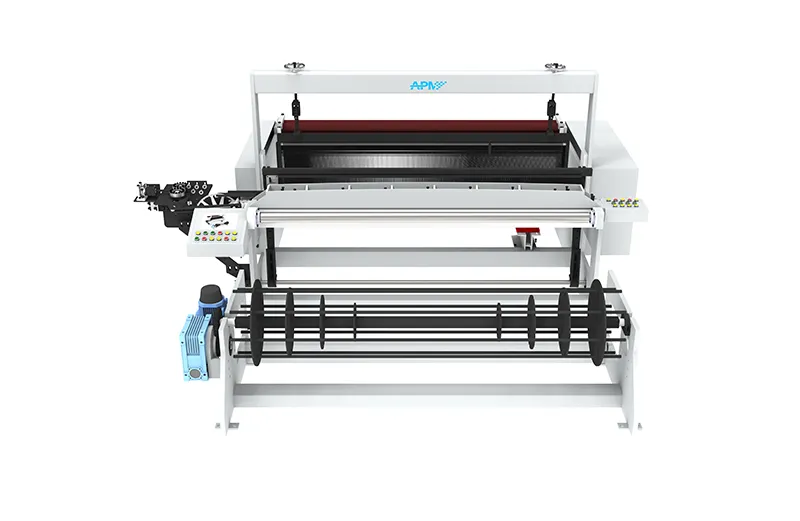
Crimped wire mesh is made by forming bends in metal wires before weaving them together on a loom. These bends, or crimps, help the crossing wires sit in position. The woven mesh is then cut to size, finished to suit its installation and inspected.
For a manufacturer, the important connection is between the finished mesh specification and the equipment setup. Wire material, diameter, opening size and crimp pattern all need to be defined before production starts. At APM, these are the starting points for matching the crimping equipment and weaving machine to your product.
Why Is Wire Crimped Before Weaving?
Pre-crimping creates seats for the crossing wires. It helps maintain regular openings, particularly in coarse mesh where the wires are spaced relatively far apart. The shape of the crimp also affects how firmly the wires remain positioned at their intersections.
In production, this means the loom needs correctly formed wires from the start. If the crimps do not align with the intended intersections, adjusting the weaving machine alone will not resolve the mismatch.
How Is Crimped Wire Mesh Made? Step-by-Step Process
Step 1: Select and Prepare the Wire
Begin with the finished mesh drawing or specification. Confirm the material grade, wire diameter, clear opening, crimp pattern and required width. State the opening dimensions in both directions when the mesh is rectangular.
Clear opening and wire spacing are different measurements. Clear opening is the gap between adjacent wires; pitch is their center-to-center spacing. For regular mesh made from round wire:
Pitch = clear opening + wire diameter.
For example, a 20 mm clear opening with 5 mm wire gives a nominal 25 mm pitch. If 20 mm refers to the pitch instead, the clear opening is only 15 mm. Marking the measurement on a drawing avoids ordering tooling for the wrong mesh.
Before forming, check the incoming wire diameter and condition. Set the payoff and straightening equipment so the wire feeds consistently into the crimper.
Step 2: Pre-Crimp the Warp and Weft Wires
The wire passes through profiled crimping wheels that form the required bends. The tooling must match the wire diameter, intended mesh opening and crimp pattern.
Warp wires will run along the mesh length, while weft wires will run across its width. Both need the appropriate crimp geometry before they are interlaced. Depending on the production setup, weft preparation can take place beside the loom or as a separate operation.
Our automatic wire crimping machine range includes wire straightening and pre-crimping equipment, with cutting functions on selected models. Preparing and cutting individual wires at this stage is separate from trimming the completed mesh later.
As a setup check, place a few prepared warp and weft wires together. Check how the crossing points fit before preparing the full batch.
Step 3: Set Up the Loom and Align the Warp Wires
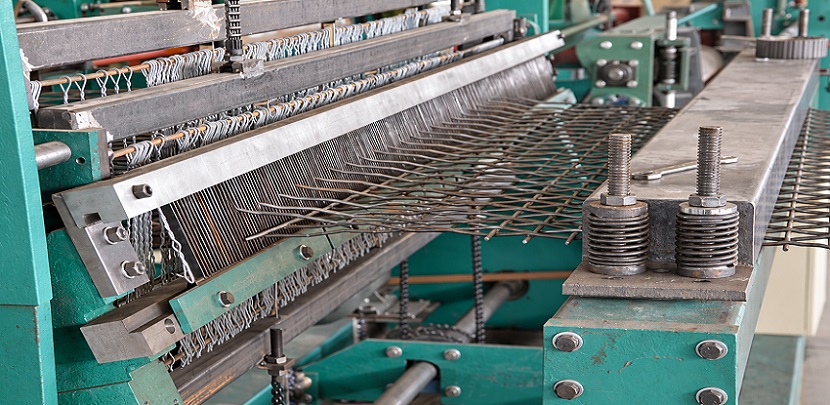
Position the prepared warp wires across the working width and thread them through the appropriate heddles. The heddle frames move groups of warp wires to create the opening through which each weft wire passes.
Check the threading order, spacing and alignment before running. A misplaced warp wire can create a defect that continues along the panel, so inspecting the initial setup is more useful than discovering the error after weaving.
Step 4: Insert the Weft and Weave the Mesh
Each weaving cycle has three main actions:
Shedding: the heddle frames separate the warp wires to open a path for the weft.
Weft insertion: a cross wire enters that opening, either manually or through an automatic insertion mechanism.
Beat-up: the loom moves the inserted wire into its intended position in the forming mesh.
The heddle frames then change position for the next insertion. Repeating the sequence produces the specified weave. Check the first woven section before continuing the run. Look for properly seated intersections and consistent openings across the width, including near the edges.
Step 5: Cut the Mesh and Finish the Edges
Cut the woven mesh to the required panel dimensions. The next operation depends on how the customer will install it: some orders require flat panels, while tensioned screening panels may need formed hooks or other edge details.
For hooked screens, the drawing should distinguish the screening area from the finished mounting dimensions. Hook shape and orientation matter because they determine how the panel fits the screen deck.
Double Crimp, Intercrimp, Lock Crimp and Flat Top: What Changes?
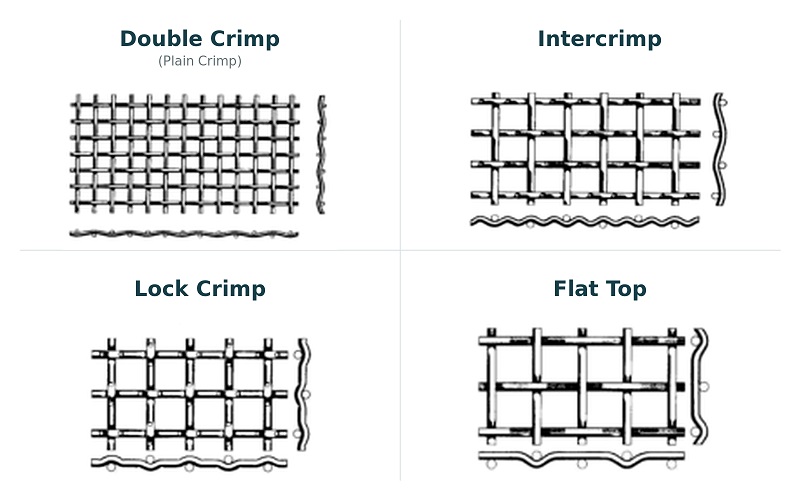
The crimp pattern changes the bends in each wire and the shape of the finished surface. It therefore needs to be specified alongside the wire diameter and opening size.
| Crimp pattern | Wire arrangement | Main characteristic |
| Double crimp | Both wire directions have regular bends at the crossings. | A straightforward construction with repeating intersections. |
| Intercrimp | Additional crimps sit between the crossing points. | Used for relatively open mesh, with intermediate bends between intersections. |
| Lock crimp | Defined bends hold the crossings, with straighter wire sections between them. | Helps resist movement at the intersections. |
| Flat top | The crimp geometry is offset to one side of the mesh. | Creates a flatter face on the opposite side for material contact. |
When ordering replacement tooling, send a close-up photograph or a sample as well as the pattern name. That makes the intended geometry easier to confirm.
What Equipment Is Needed to Make Crimped Wire Mesh?
A production setup needs equipment to prepare and crimp the wire, a loom to weave it, and suitable cutting equipment. Edge bending is added when the finished screen requires it.
Match the crimper and loom to the same mesh specification. Check that both can handle the required wire material and diameter, then confirm the opening range, working width and crimp pattern. A suitable crimper does not automatically make every loom suitable for the resulting wire.
Our crimped wire mesh machine range includes different arrangements for wire size and weft handling. For example, the APM F101 covers 0.7–2.0 mm wire, while the F102 covers 1.5–4.0 mm wire. The S101 and H101 use manual weft insertion. Selecting between them also requires the material grade, mesh geometry and finished width.
For output planning, include wire preparation, loading, changeovers and finishing. Weaving speed alone does not tell you how many finished, inspected panels a line will produce per shift.
What Quality Checks Are Needed During Production?
Check the prepared wire and the first woven section before committing to a full production run. Use the approved drawing to define acceptance limits for the following items:
Wire diameter and material: verify the incoming wire against the order. Measure diameter on a suitable, undeformed section.
Crimp consistency: check the repeat spacing and profile, and look for visible cracks, scoring or inconsistent bends.
Mesh openings: measure clear openings in both directions and at several positions across the panel.
Weave and intersections: look for missed or misplaced wires, uneven seating and unexpected movement at crossings.
Panel dimensions and shape: check width, length, squareness and flatness after cutting.
Finished edges: inspect cut ends, hook dimensions and any damage introduced during edge forming.
Treat the first accepted panel as a setup reference. Recheck the relevant dimensions after a wire change, tooling change or machine adjustment. This gives operators a defined point of comparison during the run.
FAQs About Crimped Wire Mesh Manufacturing
Is crimped wire mesh the same as woven wire mesh?
Crimped wire mesh is a type of woven wire mesh. Its wires are shaped before weaving. Other woven meshes, particularly finer cloth, can be woven from straight wires that bend during the weaving process.
Does crimped wire mesh need welding at the intersections?
No. The woven construction and crimp geometry hold the crossing wires in position. Welding may be part of a separate framing or fabrication operation if the finished assembly requires it.
Can stainless steel be used to make crimped wire mesh?
Yes. Our crimping and weaving equipment includes configurations for stainless steel wire. Provide the grade and diameter when requesting a machine recommendation so we can check them together with the opening size and crimp pattern.
Can crimped wire mesh production be automated?
Yes, suitable systems can automate wire preparation, weft insertion and weaving. The extent of automation depends on the mesh and equipment configuration. Include loading, cutting and edge finishing when deciding how much of the production process to automate.
Can one set of crimping wheels handle different wire specifications?
Only where the tooling is suitable for those specifications. Changes in diameter, opening or pattern may require different wheels. A change in material grade also calls for a forming check before repeating the previous settings.
What determines the production time for a mesh panel?
Panel dimensions, weft spacing, insertion speed and handling time all contribute. At the same panel length, closer weft spacing requires more insertions. Setup, wire preparation and finishing must also be included when estimating the total production time.
Conclusion
Consistent crimped mesh depends on matching wire preparation, crimp geometry and loom setup to the finished product. Before selecting equipment, define the mesh you need to make.
Send APM your material grade, wire diameter, clear opening, crimp pattern, finished width and target output. Include a drawing or mesh sample, plus any edge requirements. Contact our team to discuss the crimping, weaving and finishing equipment for your production line.
 English